Monday, August 19, 2013

Dyed Leicester Longwool Fleece

The colors below were dyed on Leicester Longwool that I purchased in the grease at the New Hampshire Sheep and Wool Festival this spring. I scoured the fleece, then dried it on the screens. I used Greener Shades dyes, which come in a kit. I purchased mine from Knit Picks. It is about $35 or so, and the kit dyes up to 13 pounds of fiber. The directions leave a lot to be desired. I would not call the set of dyes a kit , at all, because of the lack of clear directions, but, nevertheless, the dyes are excellent, and I used Deb Menz's "Dyeing in the Kitchen" DVD to get me started with how to proceed with mixing the dyes up and using them. The colors are clear and strong, and very mix able. I obtained some clear, beautiful true colors when I mixed them together, and when toning them down with black, for deeper shades. I found it best to purchase a large plastic tub to put all of my dye supplies and equipment in. This way, when I want to have a dye day, all I have to do is pull out the tub, and everything I need is at my fingertips. 
You will need:
A digital scale that can weigh In grams and pounds
Plastic table cover
Buckets
Measuring spoons
Smooth sided clear plastic cups
Colanders
Plastic knives or stirring implements of some kind
Sponges and rags for wiping spills
Rubber gloves
A thermometer
Pots with lids
9x13 roasting pan--good for casserole dyeing
Saran Wrap
Synthrapol
Stencil brushes (large work best)
Plastic syringes without the needle (you can get these at farm supply stores) that measure in milliliters or cc's (these are both the same)
Canning jar steamer kettle with wire rack insert
Dyes stock containers (I use the plastic disposables with good fitting lids, that hold 3-4 cups of liquid)
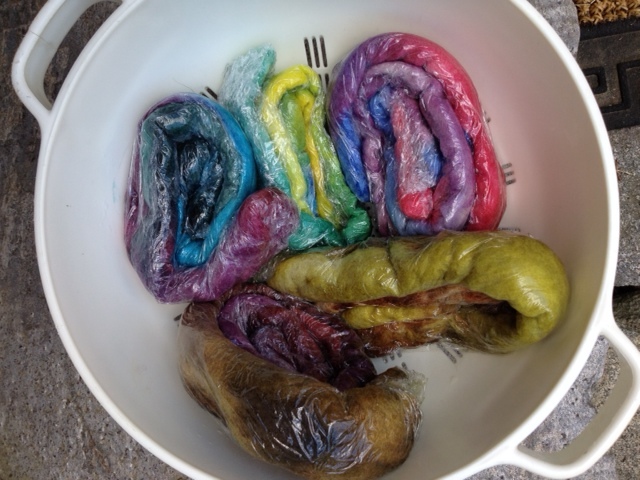
These items will get you started. You may wish to add others as you go. I store my tub in the basement, where it is cool, and I keep the extra dyestuff there as well, rather than in the attic. I keep a couple of old house screens in my basement to dry the fibers on out of doors on a sunny day. Most of my dyeing days are in the summer and fall, when the weather is nice, and I can make a mess outdoors and not have to worry about it! Then, I have beautiful dyed fiber to work with all winter long at my spinning wheel. The photos below show some of the rich colors I got on this fleece. I had to be very careful when dyeing these locks, felting can be an issue when working with them and the hot dye liquor! Avoid agitation, and you should be fine. I can't wait to card and spin some of these locks into yarns! I can envision some interesting art yarns with these....


Sunday, August 11, 2013

August Dye Day!

A sunny, dry day, perfect for outdoor dyeing. Today was so much fun, and I now have bags full of wonderful color ways to experiment spinning with! I used about 2/3 pound of 100 percent wool roving, soaked in Synthrapol (about a 1/4 cup, in 3 gallons of water). Using a 1% solution of Greener Shades dyes, I toned down the intense colors in most of these samples with the addition of black dye. I prepared 1% solutions, but since I was handpainting the wool, I ended up using more than what I had prepared, and had to go back in the kitchen to prepare more dye to finish all 350 grams (roughly 2/3 pound fiber). The one labelled "Parakeet" had no black in its colors. These are the pure hues resulting from the dye stock, with approximately a two to one ratio of dye stock to fiber weight. This was a purely experimental day, one meant for me to get comfortable with the dyes, and the resulting colors. Next, I would like to play with color schemes, tints, shades and more color theory! I notice that I have to be careful not to felt the fiber as I apply the dye with the stencil brushes. The fibers were painted on top of Saran Wrap, sealed up and rolled, then put in a steam bath over the stove, using a canning kettle with a wire insert to lay the rolls on as they steam. This took about a half hour to complete. The rolls were left to cool down, then unwrapped, rinsed gently with water, and hung to dry, after fluffing slightly with my fingertips. They are so pretty, I hate to use them! Coming up with the names for these color ways was so much fun. The one called "Mountaintop" was so named because my daughter and I had just recently visited the summit of Mount Graylock in the Berkshire Mountains of Massachusetts. These colors were all around us  as we looked around at the vista that lay before us, up in the clouds! I will have fond memories of that day forever!